Our Must-Have List of Home Canning Supplies & Equipment
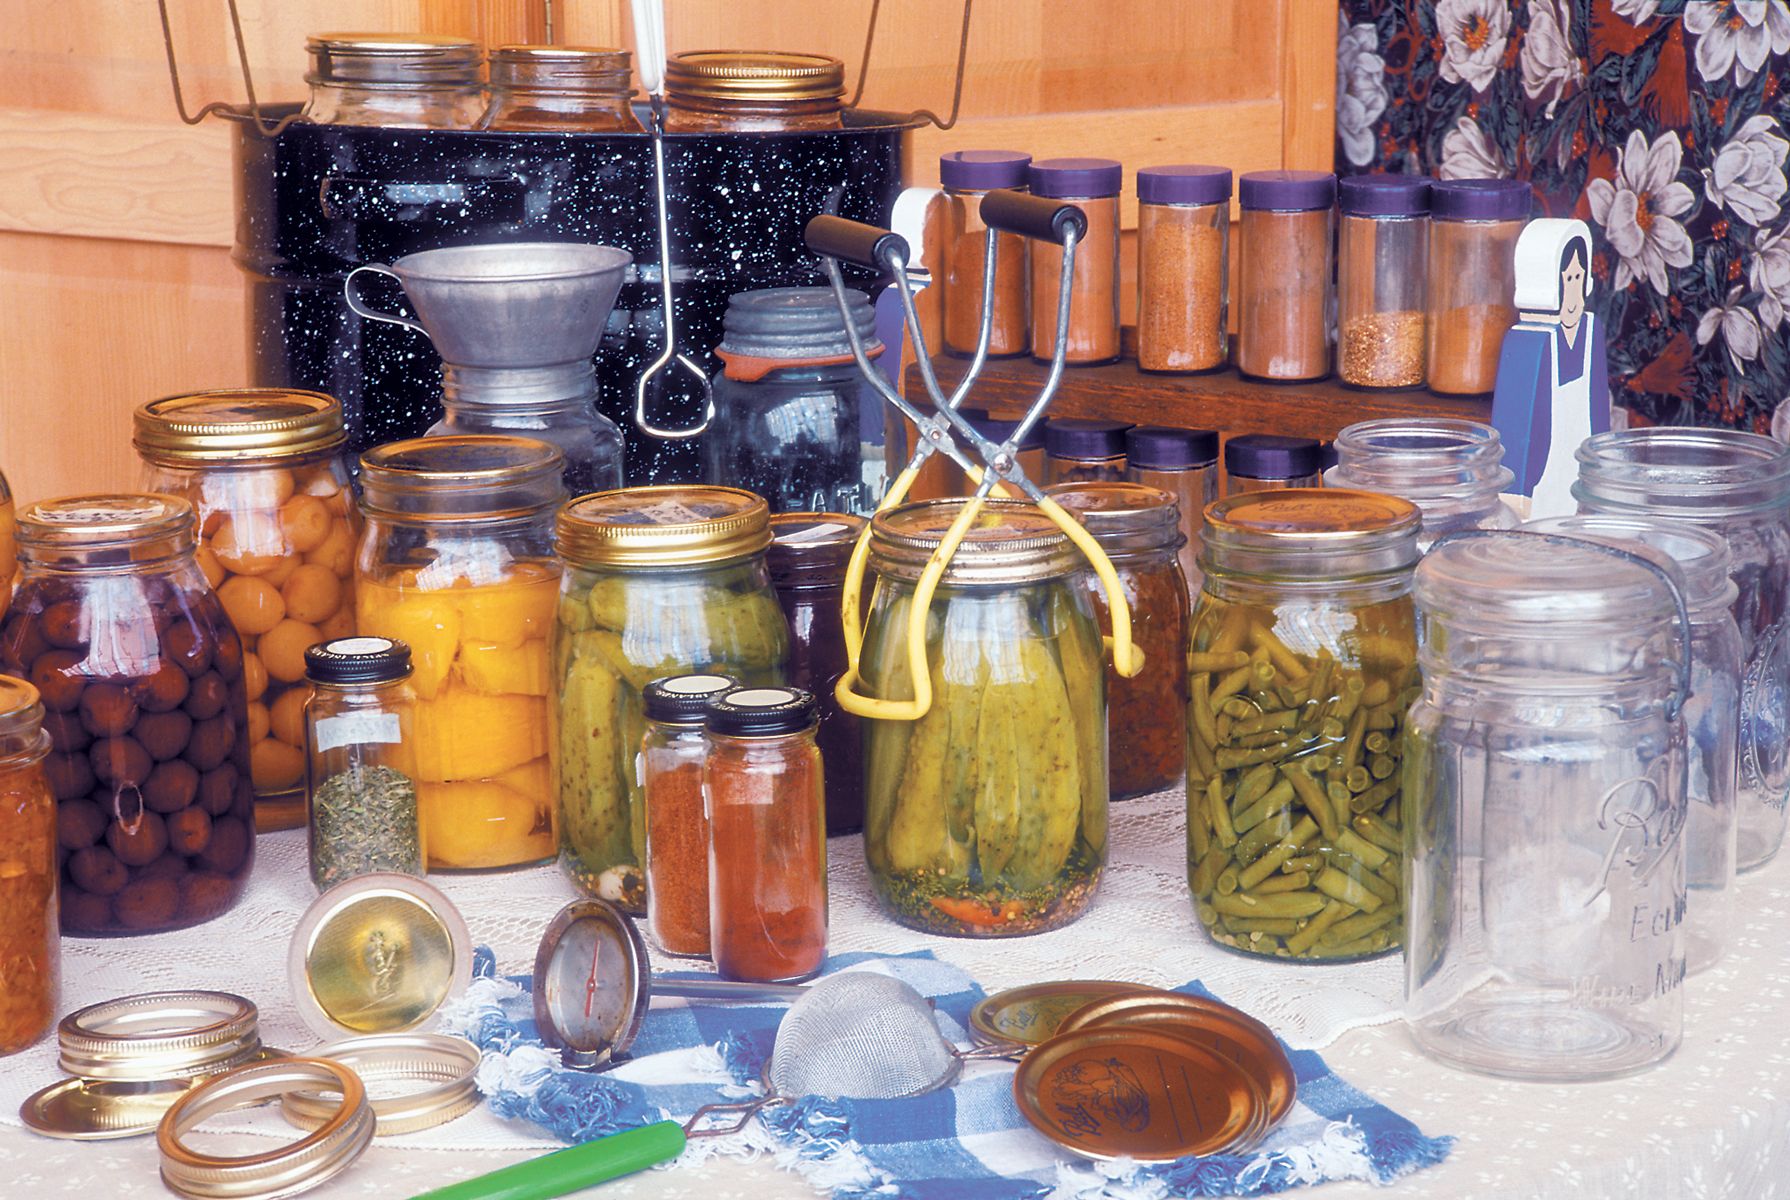
Home canning is a popular kitchen activity these days. It's a fantastic way to keep your favorite fruits and veggies tasty all year round. Since you are here reading this post we assume that you are in for canning.
And we know you want to ensure your homemade jams pickles or sauces turn out just right. Here it's super important to have the right tools and gadgets. That's why a detailed canning supplies list is a must-have. They become your secret recipe for canning success guiding you to make the best preserves.
But there is an issue!
And that's the key – sourcing the perfect canning supplies! Fear not because Ofmum is here to guide you.
Let's begin with introducing Blain's Farm & Fleet your ideal destination for all things canning. This store is a treasure trove for home canning enthusiasts of all skill levels. From the basics to the advanced they've got an extensive range of canning essentials to suit everyone’s needs. Their products are top quality and they know their stuff when it comes to tools and equipment for home canning.
Now let us proceed to the next step.
In this blog we will talk about the essential items for a smooth canning experience. We'll discuss each tool and why it's a must-have in your kitchen. We will share some handy tips and tricks to make your canning journey easy and more enjoyable. We have all the information you need. So let's gear up and get ready to explore the wonderful world of home canning together!
1 Canning Jar Lid Lifter
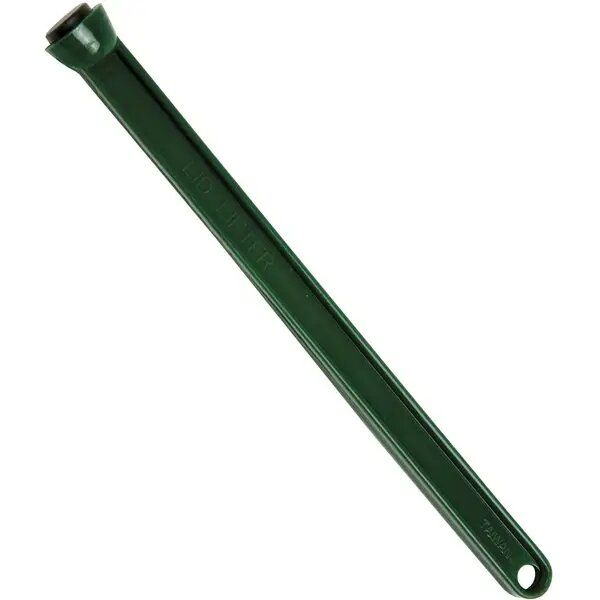
The Canning Jar Lid Lifter is a must-have among home canning essentials. This gadget is designed for the safe handling of sterilized lids. It ensures a hygienic canning process by preventing direct contact. It's a safeguard against burns when dealing with hot lids and its magnetic end allows easy pick-up of lids from boiling water.
Apart from its practicality the lid lifter tells about the importance of efficiency and safety in home canning. Suitable for beginners and seasoned canners this tool is a simple yet crucial addition to any canning toolkit.
Usage Instructions
- Sterilize the canning jar lids in boiling water.
- Use the magnetic end of the lid lifter to retrieve the lids.
- Gently place the lid on the prepared jars avoiding any contact.
- If necessary use the lifter to adjust the lids for a perfect fit.
Secret Tips and Tricks:
- Dip the lifter in vinegar to improve grip and prevent rust.
- Use the lifter to gently tap the center of the lid ensuring a secure seal.
- Keep a separate lifter for lids and bands to avoid cross-contamination.
- Store the lifter in a clean dry place to maintain its magnetic quality.
2 Canning Funnels
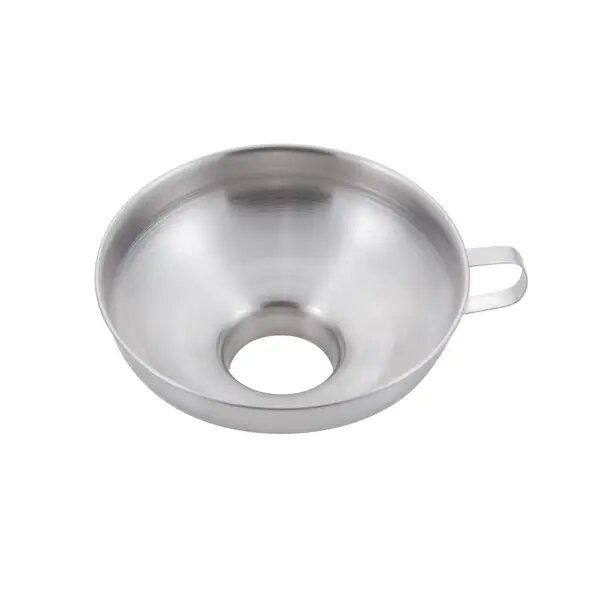
A Canning Funnel is a game-changer in the home canning process making its spot on any list for canning supplies. Owing to its design it can fit on different jar sizes. It helps in transferring preserves into jars neatly and efficiently.
This tool reduces spills and overflows. That makes the canning process cleaner and more manageable. Its importance in achieving the correct headspace for proper sealing is unmatched. It is ideal for people looking to simplify their canning process and make sure they of a tidy kitchen.
Usage Instructions:
- Position the funnel on top of your sterilized canning jar.
- Pour or ladle the food product into the jar through the funnel.
- Fill to the recommended level ensuring proper headspace.
- Remove the funnel carefully and clean any residue from the jar rim.
Secret Tips and Tricks:
- Preheat the funnel with warm water to prevent it from cracking hot jars.
- Mark your funnel with headspace measurements for precise filling.
- Use a silicone funnel for better grip and heat resistance.
- After use clean the funnel thoroughly to avoid any residue buildup.
3 Pressure Canners
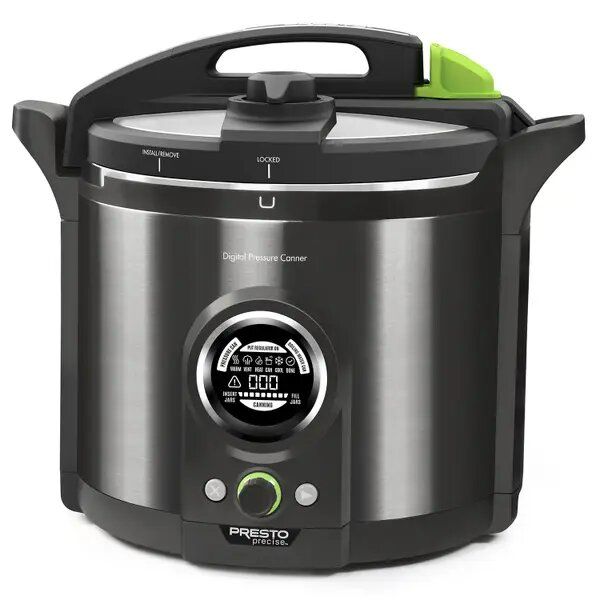
Pressure Canners are critical for the safe preservation of low-acid foods. That makes them an essential part of home canning. By using high-pressure steam these canners achieve the necessary temperatures. So that you can safely process foods like vegetables and meats.
They offer a secure canning method ensuring the food is delicious and free from harmful bacteria. Suitable for different canning projects they come in various sizes to adhere to the needs of any home canner. With a pressure canner you can broaden the range of foods you preserve adding nutrition and variety to your home-canned goods.
Usage Instructions:
- Fill the canner with the recommended water level and preheat.
- Place your sealed jars on the rack inside.
- Lock the lid and heat until steam flows steadily from the vent.
- Begin timing once the desired pressure is reached and stabilized.
Secret Tips and Tricks:
- Regularly inspect the rubber gasket and vent for wear and tear.
- Adjust the heat source during processing to maintain steady pressure.
- Always allow the canner to cool naturally before opening.
- Keep a record of processing times and pressures for various foods for further reference.
- Ensure the canner is thoroughly dried after each use to prevent rusting.
4 Canning Jar Lids
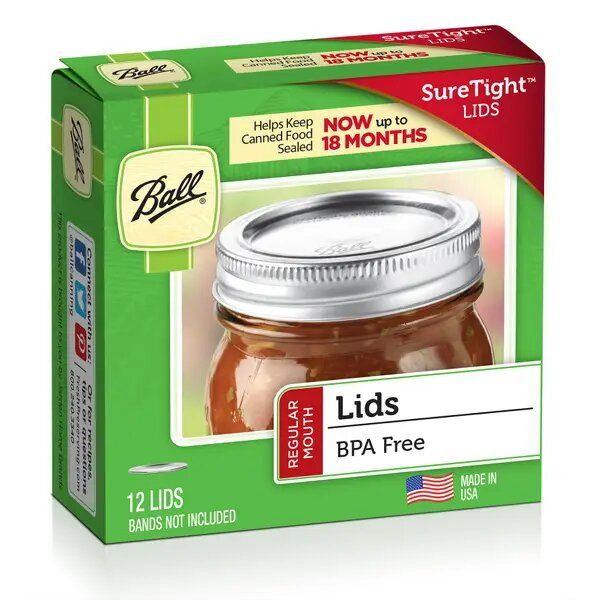
Canning jar lids are a fundamental component in the home canning process. They are a key item on any canning supplies list. These lids are expertly crafted to form a tight seal guaranteeing both the extended shelf life and safety of your canned items. Engineered to fit seamlessly onto standard canning jars their primary role is to ward off spoilage thereby preserving the freshness and quality of your homemade preserves. The lid's seal is integral in the canning process reacting with the jar rim to lock in freshness. For those passionate about preserving quality canning jar lids are non-negotiable for successful home canning.
Usage Instructions
- Keep new lids in simmering water for a few minutes so that the sealing compound is soften.
- Center the lid on the clean rim of your filled canning jar.
- Screw on the band till the time it's finger-tight.
- Process the jars in a canner as per your recipe's instructions.
Secret Tips and Tricks:
- Make use of new lids always for each batch to ensure a proper seal.
- Check for any dents or irregularities in the lids before use.
- After processing press the center of the lid to test the seal.
- Store your canned goods without the bands to detect any improper sealing.
5 Canning Jar Racks
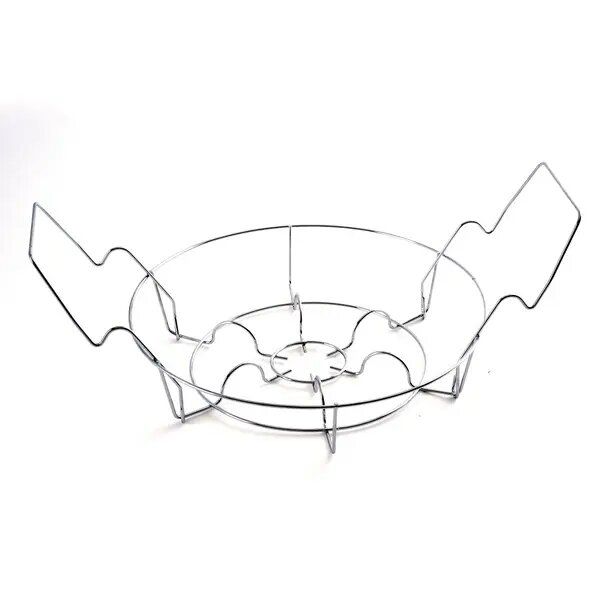
Canning Jar Racks are crucial for any home canning enthusiast. They serve as an indispensable part of your home canning essentials. These racks are designed to hold jars securely during the canning process. This can prevent them from touching each other or the canner’s bottom which can lead to breakage. Elevating the jars allows water or steam to circulate evenly. This can ensure consistent heat distribution for proper processing. Durable and versatile canning jar racks are necessary to safeguard your jars and their precious contents during the canning process.
Usage Instructions
- Place the rack at the bottom of your canner before filling it with water.
- Keep the sterilized jars onto the rack making sure they don't touch each other.
- Lower the rack into the canner once all jars are securely placed.
- After processing use the rack to lift out the jars and cool them.
Secret Tips and Tricks:
- If your rack doesn’t have handles use jar lifters to remove hot jars.
- Place a small towel on the rack to prevent jars from rattling during processing.
- Ensure the rack fits your canner size for optimal performance.
- Dry the rack thoroughly after use to prevent rust and prolong its life.
6 Ladles
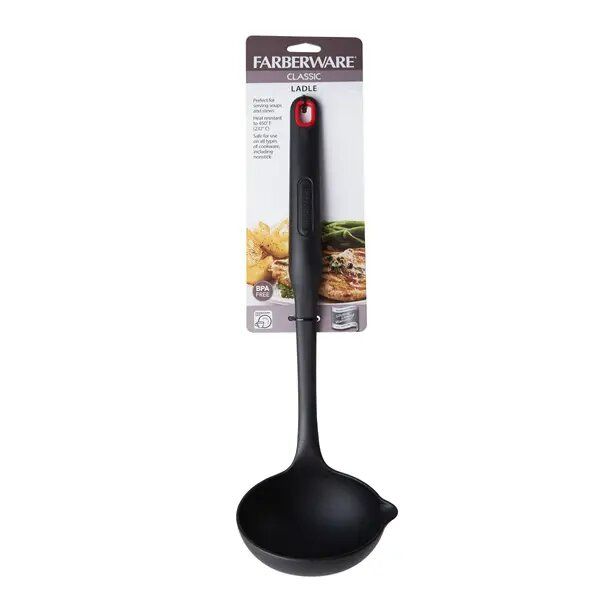
Ladles are an essential tool in the canning process often overlooked but vital in any supplies list. These utensils are perfect for transferring liquids like soups broths or sauces into canning jars with precision and minimal spillage. A good spoon ensures that you maintain the necessary headspace in your jars for proper sealing.
They come in different sizes and materials. They offer various options for different canning needs. For a smooth and mess-free canning experience a durable and well-designed ladle is an indispensable tool.
Usage Instructions
- Sterilize the ladle before use.
- Scoop your prepared product with the ladle.
- Carefully transfer the contents into the canning jars using the funnel if necessary.
- Maintain the recommended headspace in each jar.
Secret Tips and Tricks:
- Opt for a ladle with a pour spout for better control.
- Use a stainless steel ladle for durability and ease of cleaning.
- Hang the ladle near your workspace for easy access.
- After use soak the ladle in hot soapy water for thorough cleaning.
7 Bubble Popper
A Bubble Popper is a simple yet essential tool in your home canning essentials. They are tailored to optimize your canning process effectively. This instrument is key in eliminating air bubbles from jars prior to sealing a step that's essential for maintaining both the quality and safety of your canned products.
Air bubbles can affect the jar's seal and the food's shelf life. The Bubble Popper's slender design allows it to reach deep jars. This can ensure all bubbles are released and the contents are properly settled.
Usage Instructions
- Fill your canning jars with the prepared food but do leave the recommended headspace.
- Insert the bubble popper into the jar gently stirring to release trapped air.
- Run the tool along the inside edge of the jar to free any hidden bubbles.
- Remove the tool and check for any remaining air pockets repeating if necessary.
Secret Tips and Tricks:
- Sterilize the bubble popper before use.
- Use a gentle swirling motion to release bubbles.
- After removing bubbles you need to wipe the jar rim to make sure of a clean sealing surface.
- Store the bubble popper in a dry place to maintain its condition.
8 Canning Jar Racks

Canning Jar Racks are essential in any home canning essentials toolkit. They are designed for efficient and safe processing of canned goods. These racks hinder jars from touching each other and also the bottom of the canner. This can reduce the risk of jar breakage due to heat or agitation. They enable the circulation of water or steam around the jars for uniform heating and cooling. Canning Jar Racks are practical and essential for maintaining the integrity of your canned creations.
Usage Instructions
- Insert the rack into the canner before adding water.
- Arrange filled jars evenly on the rack ensuring they do not touch.
- Lower the rack with jars into the canner for processing.
- Use the rack to safely remove jars after the canning process.
Secret Tips and Tricks:
- Select a rack that fits your specific canner size and shape.
- If lacking a rack use a cloth or towel at the bottom of the canner as a substitute.
- Keep the rack clean and dry when not in use to prevent rusting.
- Handle the rack with care especially when hot to avoid burns.
Wrapping Up
So, there you have it – your ultimate guide to the must-have tools and gadgets for home canning. Think of this journey as not just learning about the canning supplies list, but as embracing a delightful and rewarding culinary adventure.
Also, don’t forget about Blain's Farm & Fleet. They are your trusty sidekick in this adventure, offering everything you need under one roof. They’re more than just a store; they’re your canning companion, supplying you with quality home canning essentials to ensure every batch turns out just right. Their wide selection and expert advice make canning a breeze, whether you’re a novice figuring out a lid lifter or a pro handling a pressure canner like a champ.
As we conclude, we at Ofmum encourage you to get ready, assemble your canning tools, and embark on the exciting journey of home canning. Whether you're a newbie or a seasoned pro, the world of canning always has fresh experiences and joys to offer. Delight in sharing your homemade treats with loved ones, and revel in the warmth of their praise. Happy canning, everyone! Here’s to filling your pantry and your life with homemade wonders!